SSO Integrations
Also,
The steps to utilize each integration are listed in sections below.
Note: There is also the option to have Azure SSO setup for emailing within Deacom. This option is separate from the Azure SSO option on this page. Details regarding that option are covered in the Configuring and sending emails in Deacom page.If companies set up Azure SSO for emailing and still wish to have Azure SSO authentication for user simply logging into the Deacom application, they will need to follow the Azure instructions on this page.
Overview
Okta
Okta is an authentication authority that provides its users with a variety of centralized services. Okta’s customer list is large and their presence in the industry is growing rapidly.
Okta’s primary service offerings for their Workforce Identity platform are:
- Single Sign On (SSO) – Okta supports industry standard protocols for SSO, operating as the one true authority on user authentication. Pertinent to Deacom ERP, Okta offers out of the box .Net assemblies to ease the integration process.
- Multi-Factor Authentication (MFA) – Okta supports a variety of MFA options above and beyond simple passwords. More cutting-edge MFA options include physical tokens and thumb-print authentication.
- Centralized User Management – Okta supports centralized user management and can create and manage users in other systems if those systems expose API calls to Okta for this purpose.
- Security Event Logging – Even in the developer portal, Okta’s security logs are very detailed. Detailed audit reporting is critical, especially when it comes to security access.
A typical Okta control flow is detailed in this helpful infographic: https://developer.okta.com/docs/concepts/saml/#planning-for-saml.
CyberArk
CyberArk offers the following capabilities:
- User Portal - Users enter one set of credentials to access all their cloud and on-premise apps in one place.
- Secure Gateway for Legacy Apps - Set up secure, per-app access to your on-premises applications without a VPN.
- Application Catalog - Thousands of pre-integrated web and mobile apps -plus security protocol templates for your custom apps.
- Flexible Cloud Directory - Create users and groups, federate identities from on-premises and cloud-based directories, or use any combination of directories to meet your specific requirements.
- Browser Extension - Enable one-click, secure access to business and personal apps - without the need for custom scripting or configurations.
Azure
Single sign-on is an authentication method that allows users to sign in using one set of credentials to multiple independent software systems. Using SSO means a user doesn't have to sign in to every application they use. With SSO, users can access all needed applications without being required to authenticate using different credentials.
Setting up and installing Okta with Deacom
Add an app integration to Okta
The first step is to set an app integration (saml2 app integration) via the Okta Admin Panel/Console . The steps are listed here: https://help.okta.com/en-us/content/topics/provisioning/lcm/lcm-add-application.htm
Okta Test Guide
Setting up Deacom in Okta should be similar to other Okta installs that a customer system administrator would normally perform. The system administrator will need to enter Deacom’s Okta URL as: https://[Customer Deacom URL]/OnOff/Okta/SAML.
- Navigate to Okta website e.g. https://dev-XXXXXX.okta.com/login/login.htm
- Login with the admin credentials
- Navigate to Applications > Applications
- Click the Deacom SAML application
- Navigate to the General tab
- In the "SAML Settings" area, (depending on version, you may need to click Next to get to the Configure SAML tab), perform the following:
- Set the Single sign on URL field to your local Deacom URL (example - https://Deacom.com/test1system/ONOFF/Okta/SAML
- Set the Audience URL (SP Entity ID) to the system name in the URL (example from above URL - test1system)
- Ensure the Name ID format field is set to "Unspecified"
- Set Application username field to "Email"
- Set Update application username on to "Create and update"
- In the "Attribute Statements (optional)" area, perform the following:
- Set Name field to "Company"
- Set Name Format to "Unspecified"
- Set Value field to 'Company Database name (not system name) e.g. "test1system" (Note: Only one company can be added at a time. There will be need to be one single Okta registration per Deacom company.)
- Leave any other section of fields as defaulted or blank
- On the right side of the screen, click Download Okta Certificate.
- Click next again, then click finish
- Sign out of the admin account
- Open the certificate that was downloaded earlier in Notepad. Copy all characters in between -----BEGIN CERTIFICATE----- and -----END CERTIFICATE-----
- Log into Deacom.
- Go System > Options > Authentication.
- Set Single Sign-On Method to Okta.
- For SSO Authentication, choose whether Okta will be sending the user’s username or email for authentication
- Close tab.
- Users will then perform the following:
- Navigate to your enterprise Okta landing site
- Log into Okta as a regular user
- Authenticate successfully
- Click on the Deacom system app (which should appear in the My Apps, or similar area, after all steps above have been followed) to log back in via SAML.
Okta E-Signature Validation
- Go to System > Options > Authentication. Set SSO URL to the base Okta URL.
- Example: https://dev.okta.com/
- Users will be prompted to enter their Okta credentials on any/all e-Signature forms in the system. The prompt will read "Please enter your OKTA credentials".
- The username that is entered must exist in Deacom as well. So if the entered Okta username is JohnDoe, then JohnDoe must be the username for both an Okta account and a Deacom account.
- Okta should accept short names as well, so if the login is normally [email protected], then JohnDoe should be a valid username.
Notes:
- Deacom will be using IDP initiated authentication.
- Deacom already contains the ability to handle authentication via SAML. For the integration with Okta, a new endpoint has been added which will validate the certificate sent from Okta. Contact your Deacom Project Manger for additional support with Okta integration.
Setting up and installing CyberArk with Deacom
Setting up Deacom in CyberArk should be similar to other CyberArk installs that a customer system administrator would normally perform. The system administrator will need to enter Deacom’s CyberArk URL as: https://[Customer Deacom URL]/OnOff/CyberArk/SAML
CyberArk Test Guide:
- Navigate to CyberArk’s website e.g. https://aalXXXX.my.idaptive.app/manage
- Login with the admin credentials
- Navigate to Apps > Web Apps
- Click the Deacom SAML application
- Navigate to the Trust tab
- Under Identity Provider Configuration:
- Set the Single sign on URL to your local Deacom URL e.g. https://deacom.com/ONOFF/CyberArk/SAML
- Drop down the Signing Certificate and click Download.
- Under Service Provider Configuration:
- Select Metadata and upload file if you have a metadata file
- Otherwise, select Manual Configuration.
- SP Entity ID = Deacom
- Assertion Consumer Service (ACS) URL = Single Sign On URL
- Recipient: check Same as ACS URL
- Sign Response or Assertion? = Response
- Save
- Navigate to SAML Response tab
- Under Attributes, click Add
- Name: "Company"
- Value: Company Database name (not system name) e.g. DeacomCompany
- Save
- Navigate to Account Mapping and select the choice of preference (likely Directory Service Field)
- Sign out of the admin account
- Open the certificate that was downloaded earlier in Notepad. Copy all characters in between -----BEGIN CERTIFICATE----- and -----END CERTIFICATE-----
- Log into Deacom.
- Go System > Options > Authentication.
- Set Single Sign-On Method to CyberArk.
- For SSO Authentication, choose whether CyberArk will be sending the user’s username or email for authentication
- Close tab. Log into CyberArk as a regular user. Click the Deacom SAML application to log back in via SAML.
Setting up and installing Azure with Deacom
- In Azure Active Directory home page, click on App registrations > New Registration
- Set Redirect URI to [https://[insert url here].com/ONOFF/Azure/SAML]
- On the Overview page, click Endpoints and copy the SAML-P sign-on endpoint
- Click Expose an API on the sidebar and set the Application ID URI
- Click App roles on the sidebar and click Create app role.
- Display name: Company
- Allowed member types: Both
- Value: company database (e.g. DS1702000Company)
- Description: anything
- Ensure enabled is checked
- Apply
- Back in Azure Active Directory home page, click on Enterprise Applications
- Click on Users and groups > Add user/group
- Add any desired users for this application
- Additionally, for security purposes, it is highly recommended to set up a certificate. See https://learn.microsoft.com/en-us/azure/architecture/example-scenario/certificate-lifecycle/ for more detail.
- Important Notes:
- Azure manages certificates with key vaults that allow auto-renewal. Every time the certificate is updated, whether by auto-renewal or manually, the new certificate must be copied and saved in Deacom.
- Deacom Support does not have access to the fields and forms used when setting up a certificate for Azure in the customer environment. Please reach out to Microsoft Azure support for guidance or documentation in this area.
- Important Notes:
- Once the certificate is set up, open the certificate in Notepad. Copy all characters in between -----BEGIN CERTIFICATE----- and -----END CERTIFICATE-----
- Log into Deacom. Go to System > Options > Authentication tab. Set SSO Certificate to copied characters. Save.
- In Deacom, go to System > Options > Authentication
- Single Sign-On Method > URL
- SSO App ID > Copy the entire Application ID URI
- SSO URL > SAML-P sign-on endpoint that was copied from Azure
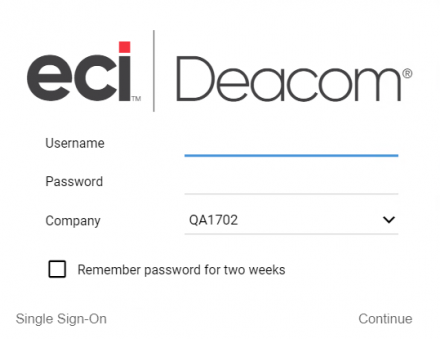
Now on the login dialog box (when logging into the main Deacom application or the Cash Register/POS system), there should be a Single Sign On button in the bottom left. Clicking this link will redirect the user to log in to Azure and then redirect back to Deacom’s home page. Additionally, users can choose whether to authenticate via Username or Email in the "SSO Authentication" field via System > Options > Authentication.
Note: If everything is configured correctly in Deacom, there will be a button at login used to authenticate and access the system as seen in the screen below.