AutoFinisher
The AutoFinisher application is a tool that companies, particularly those who serialize their finished goods, can utilize to automate the input of production and the printing of labels. In addition, the palletizing functionality of the AutoFinisher allows for efficient creation of pallets of inventory. The AutoFinisher automatically confirms that the catch weight item adheres to the weight specifications maintained within Deacom.
The information below contains information on installing, and if necessary, uninstalling the AutoFinisher application.
Notes:
- The AutoFinisher client cannot be installed on the server, but rather needs to be installed on the PCs where scales will be connected.
- The AutoFinisher application should be updated/checked for updates anytime when upgrading to a newer version of Deacom.
- The AutoFinisher install process supports 32 bit.
Installing AutoFinisher
- Navigate to the Deacom Production folder
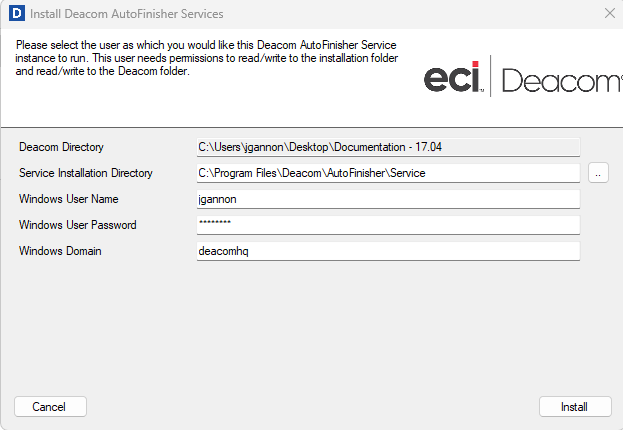
- Double click “AutoFinisher.Service.Installer.exe” executable
- Enter your Windows User Name and Password (what you use to log into your PC) and Windows Domain: Deacomhq
- Click the Install button
- The following Screen will display:
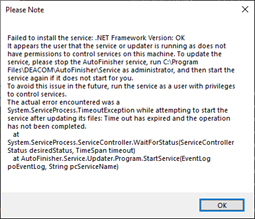
- After about a minute or so, the following prompt will display. Click the OK button.
- Click the X or Cancel button to close the “Install Deacom AutoFinisher Services” form. Click the “Yes” button to confirm closing the form
- Verify your IP Address is correct in the Deacom.ini file in your Deacom Production folder.
- (Press windows key > type cmd > type ipconfig in the command prompt > find ipv4 address > this is your IP Address)
- Launch the “Deacom.automation.console.exe”
- Open a Windows Explorer file and navigate to the following folder location: C:\Program Files\Deacom\AutoFinisher\Service
- Verify your IP Address is correct in the Deacom.ini file in this location as well
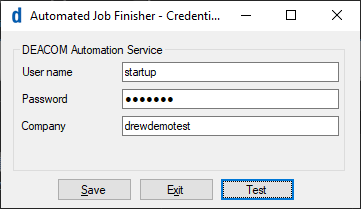
- Run “CredentialBuilder.exe” and enter a Deacom user name, password, and the company database
- Click the save button and then click test:
- The following prompt will appear: - (Image for visual reference only, do not use startup startup.)
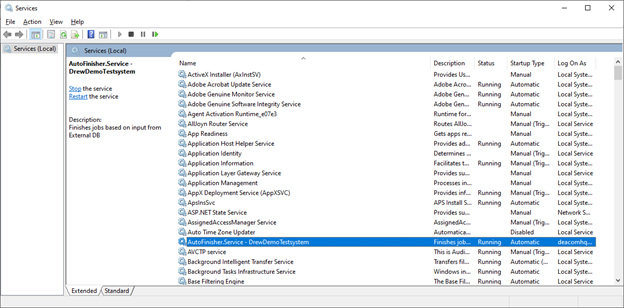
- Press the Windows key on your keyboard and type “Services”
- Press enter to open the Services form
- Click on the new AutoFinisher.Service – [SYSTEMNAME] Service
- Click the start button at the top of the form to start the service:
- Navigate to the Deacom Production folder on your PC
- Before proceeding, confirm the following:
- The necessary firewall configurations and port allowances will be needed to ensure that the AutoFinisher client can connect to the server hosting the Deacom installation.
- A scale record has to exist in Deacom via Production > Maintenance > Scales. (If a scale is not setup the user will receive an ambiguous error on login)
- Double click the “AutoFinisher.Client.Installer” (.msi/Windows Installer) file to begin the AutoFinisher installation.
- Next enter the appropriate entry in the "Host" field:
- On Premises - https://10.0.0.19:8080
- MCS/Cloud: https://deacom.deacomcloud.com:8081
- AutoFinisher is now installed on the PC

Note: The AutoFinisher application should be updated/checked for updates anytime when upgrading to a newer version of Deacom.
Unistalling AutoFinisher
- Navigate to “ C:\Program Files\Deacom” and delete the Addictiveness Folder
- Press the Windows key on your keyboard and type “Services”
- Press enter to open the Services form
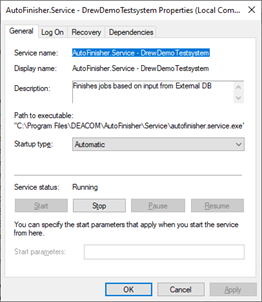
- Right-click on the new AutoFinisher.Service – [SYSTEMNAME] Service and choose Properties
- Press Ctrl + c to copy the Service name:
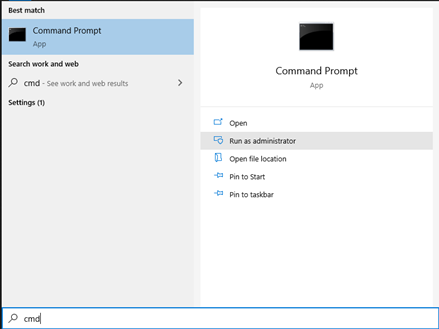
- Press the Windows key on your keyboard and type “cmd”
- Click “Run as administrator” on the right
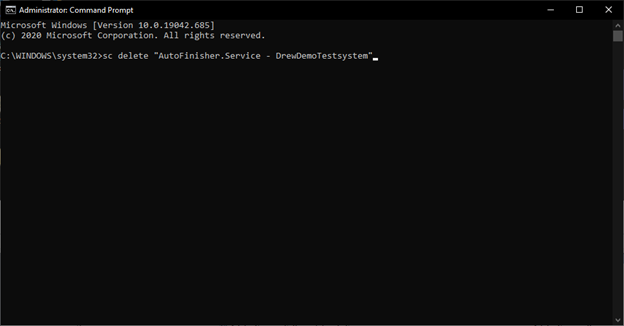
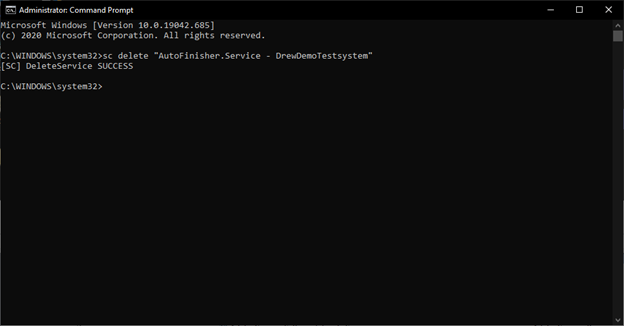
- Enter the following command in the command prompt, replacing the text in the double quotes with the service name that was copied in the earlier step
- sc delete "AutoFinisher.Service - DrewDemoTestsystem":
- Press the enter key on your keyboard to execute the command in the command prompt window
- The following message will display
- AutoFinisher is now fully uninstalled on the PC
Configuring the System
Production Options and Item Master records must be set up to allow users to successfully operate the AutoFinisher and finish inventory.
Production Options
On the AutoFinisher tab within Production Options, the following fields require values/selections:
- AutoFinisher Layout - This field defines the size of the controls on the AutoFinisher form. Options are:
- Touchscreen - Sets the controls to a very large size.
- Standard - Sets to controls to 60% of the "Touchscreen" size.
- AutoFinisher Grid Size - Option to determine how many Job finish records will be displayed and considered for palletizing on the AutoFinisher's Finishes tab. The default value for this field is 100. In situations where more than 100 finishes/case will be palletized, the value in this grid must be set to accommodate the correct number. The value in the field may be greater than the actual finishes. For example, if a customer typically finishes between 110 and 115 times, this field may be set to 120 or 125 to give some wiggle room. If finishes occur which are greater than the value in this field, these records will no longer be visible.
- AutoFinisher Alternate Weight - Option to select an alternate weight choice based on the values added in the "Attribute 1-3" fields on the lot record.
- AutoFinisher Part Label - Determines what type of label will be printed when using the Deacom AutoFinisher Client. Options are Lot Label or Job Label.
- AutoFinisher Group By - Option to select group by either "Each" or "Pallet".
- Enable AutoFinisher.Client Offline Mode - If checked, the AutoFinisher application will be able to operate in offline mode, such as when network connectivity is lost. In this case, AutoFinisher will keep track of what it is producing and sync all relevant data once the application is returned to an online status.
Item Master settings
Navigate to the tabs listed within Inventory > Item Master and enter values/make selections for the fields listed.
General 1 tab
- Stock Unit - Defines how the item is stocked. All of the container units should have a Units of Measure type of "Each" so that the conversions work as expected. This is done in the Units of Measure edit panel under Inventory > Maintenance > Units of Measure.
- If a container holds multiple items and each item and container is labeled, this value should be "Each", and both "Unit Serialization" and "Container Serialization" should be checked.
- If a container holds multiple items and the individual items are not labeled, this value should be the Unit of Measure for the container (Case – 4 etc.), "Unit Serialization" should be checked, and "Container Serialization" should be un-checked.
- If the container holds a single item and only the container is labeled, this value should be the Unit of Measure for the container (Case – 4 etc.), "Unit Serialization" should be checked, and "Container Serialization" should be un-checked.
- Container Unit - Defines how many individual each parts make up a container of the item number. All of the container units should have a Unit of Measure type of "Each" so that the conversions work as expected.
- Pallet Unit - Defines how many individual each parts make up a pallet of the item number. This can be overridden in the AutoFinisher by selecting additional finishes to issue to the pallet.
General 2 tab
- Shelf Life Days - The shelf life for an item number in number of days.
Properties tab
- Unit Serialization - This flag must be checked for all items processed via the scale.
- Catch Weight - This flag must be checked for all catch weight items.
- Unit Containerized - This flag must be checked for all items packaged into a container.
Calcs tab
- Min Weight - Defines the minimum weight allowed for the selected item when using the AutoFinisher.
- Max Weight - Defines the maximum weight allowed for the selected item when using the AutoFinisher.
- Tare Weight - The default tare weight of a finished good.
The assumed Units of Measure for the fields listed are pounds. When using the AutoFinisher, users will be prompted if the item weight is less/more than the min/max values specified.
Configuring the Scale Model
Scale model parameters are defined via Production > Maintenance > Scales. The following needs to be configured prior to using the AutoFinisher:
- COM Port: Defines the COM Port that the scale is running on.
- Baud Rate: Defines the baud rate used to communicate to the scale. Default is 9600.
- Data Bits: Defines the number of data bits in the message received from the scale. Default is 8.
- Stop Bits: Defines the number of stop bits in the message received from the scale. Default is 1.
- Parity: Defines the parity setting used to communicate to the scale. Default is None.
- Handshake: Defines the protocol used to communicate to the scale. Default is None.
- Scale Mode: Determines the conditions for performing finishes. Default is Single, or users may instead choose Continuous.
Note: The AutoFinisher
Configuring Labels
AutoFinisher labels are defined by the "ZPL Definition" field on the Edit Part Forms form. To edit this field, the "Print Method" must be set to "ZPL". After the label is defined and saved, the "Print Method" can be set to "Designer" again, and AutoFinisher will continue to use the ZPL definition. Expression processing for AutoFinisher is currently very rudimentary. Most expressions will be ignored entirely, and only a small set of variables are available. We recommend the following resource for laying out ZPL Labels: http://labelary.com/viewer.html. If no labels have a ZPL definition, the following default label will be used:
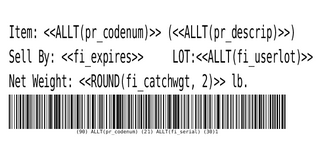
ZPL Code
^XA~TA000~SH30^PR12,12,12^LH0,50 ^ADN,36,14^FT20,50^FDItem: <> (<>)^FS ^ADN,36,14^FT20,100^FDSell By: <> LOT:<>^FS ^ADN,36,14^FT20,150^FDNet Weight: <> lb. ^FS ^ADN,24,14^FT20,235^BY1,3.0^BCN,70,Y,N,N,N^FD<>^FS ^PQ1^XZ